Thursday, November 28, 2013

Baby Quilt

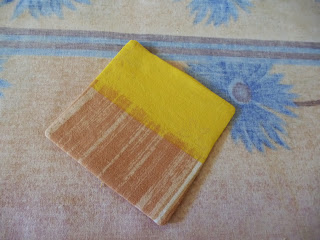
This was my second project. The plan was to make this first but then I decided to make some quilted coasters as for practice and of course getting that confidence again that I can get back to using a sewing machine after all these years.


Design:
I came across this design online along with basic tutorial.

Materials:
Along with the basic tools (scissors, quilting pins, cutting board, rotary cutter, ruler) and sewing machine I used the following:

Top: I bought a fat quarter (18" * 22") bundle which had 8 different fat quarters and 1.5 yds of cream fabric for borders and in between columns.

Backing: 1.5 yds light brown print fabric. Some of the fat quarters had brown shades so it made sense to get some light shade of brown.

Binding: 0.5 yds of dark brown print fabric.

Batting: 44" * 55" batting. You should decide on the loft based on your needs. I used an extra-loft poly-fill batting. Cotton might be easier to quilt.

Note: Seam allowance for all stitches is 1/4".

Prepare Top: 
  1. Cut 2.5" * 5" pieces out of fat quarters for the print strips. Join 22 of these to form one strip. You can decide on the order of various prints according to your own taste of colors. Make 5 such strips.
  2. Iron on the back seams to fold them all in same direction. Measure the length of the strip and say its L1.
  3. Cut 6 strips of the cream fabric (cut along lengthwise grain) each of L1" * 3.5".
  4. Join the cream strips and the printed strips in alternate order. 
  5. Iron on the back of the joined fabric and move all seams towards the dark fabric side.
  6. Measure the width of this fabric and say its L2.
  7. Cut 2 strips (cut along the crosswise grain) each of L2 * 3.5".
  8. Join these strips on top and bottom of the unfinished top.
Your top is ready now. Measure the length and width of the finished top after ironing the seams on the back. Say its L" * W".

Prepare Back:
I also used a strip of printed fabric from the top to create a strip at the back. Its optional though.
To decide on how many 2.5" * 5" pieces I need to stitch together to make it fit in the back width, I did the math: x * 2.5 - (x-1) * ¼ = W + 3. Cut 'x' number of 2.5" * 5" pieces and stitch them together. Cut 2 pieces of backing fabric as:
20" * W + 3"
(L - 4.5 - 17)" * W + 3"  [Note: we have added an extra 3" in length and width]
Join all 3 pieces of fabric in order (2 cut pieces with the top fabric strip in between).
Iron on the seams and over the complete fabric back. The back is also ready.

Prepare Quilt Sandwich:
You now need to prepare the quilt sandwich to quilt it. Lay the backing with wrong side up on a flat surface/floor. Lay out the batting on top of it by making sure that the back doesn't move or form folds. Finally place the top on top of batting. Usually you use some kind of spray adhesive to make the batting stick to the backing. I did not use anything. I just used lots of pins all over to keep the 3 layers intact.
Now its time to quilt all over so that the three layers are stabilized and also to make sure the batting won't move when the quilt is washed. I mainly used stitch-in-the-ditch all over. I am yet to get used to free-motion quilting. Will try on something smaller.


Add Binding:
Once the quilt is done, its time to attach binding to the sides of the quilt.

Binding:
5 strips cut cross grain of 2.5” each
½ yard


Sunday, November 10, 2013

Dining Table Runner

Finally I got some time to write this long pending tutorial. Just as a note, this will probably not be the best as I forgot to take pictures in between while making it. Still it will give overall idea of what I did.

Fig 1. Complete runner
As usual this is a quilt which means it has 3 layers: Top, Batting and Backing which are then quilted to hold it together and then bound together with the binding. 

Design: 
I don't remember where I saw this design so I am not going to put any link here. I wanted to make table runner of size 40" * 15".

Materials: 
Basic tools: scissors, quilting pins, cutting board, rotary cutter, ruler and sewing machine.

Note: Seam allowance for all stitches is 1/4"
Top:
If you look at the picture above, you can see that that top is composed of 3 big blocks and the surrounding layer of small blocks. I made the inner blocks first and then attached the boundary strips of smaller blocks. To make one block:

Take 8, 3" * 3" of each of the 2 contrast color prints fabric. These will form 16, 3"*3" squares as shown in Fig. 5. The way its done is by taking 1 piece of each color and put the right sides together and then draw a line with a pencil/pen diagonal as shown in Fig 3. Stitch straight on either side of this line leaving 1/4" seam allowance as shown in Fig. 4. Once you are done will all 16 square pairs, cut on the line you had drawn earlier. Press/iron the seams an usual. You will end up with 16 squares similar to Fig. 5.

Fig. 2
Fig. 3
Fig. 4


Fig. 5
The next step is to join these squares and form a nice big square block as shown in Fig. 7. Combine squares to form rows first and then combine these to form the complete block. I think I ended up with 8.5" * 8.5" block.
Fig. 6


Fig. 7
The next thing I did was cut 4, 2" * 11" strips of off white cloth. Attach these strips as boundary to the above block. You want to attach them such that the strip starts at one corner of the block and continues beyond the end on that side. It may be more clear in Fig. 9. Once you have all 3 blocks finished, its time to make the strips to combine these. I used some leftover fabric to make these. I think I used 5-6 pattern fabrics to make them. I don't remember how big I cut the squares to combine them to form a strip but you can measure the completed block above and based on that, cut smaller square blocks to form a strip to attach to its 2 sides. You need to make 4 such strips so that you can attach all 3 blocks above. Once that is done, you need to make 2 longer strips for the complete length of the runner. Attach these to complete the top as shown below.
Fig. 8

Fig. 9

Batting: For this table runner, I used cotton batting which is easy to quilt with. Everything was bought from Walmart and is super cheap.

Backing: I used the light print from the center blocks as backing. Again, I forgot to take a picture of the back. Remember to cut the batting and backing 1" extra than the top on all sides.

I used stitch-in-the-ditch for quilting. Once the quilting is done, add binding. I used the darker fabric from the center block for binding.

Fig. 10

Saturday, October 5, 2013

Quilted Waterproof Coasters


Some of my friends requested to post a tutorial on how to make these quilted coasters out of fabric scraps. So here is a quick tutorial on how to make your own. This one is a simple one with the front and back piece made out a single piece but you can try different layouts with multiple pieces.
Happy Quilting! 


Cut 2, 4.5" * 4.5" pieces for front and back of the coaster.


Put the right sides of the front and back pieces together and sew around the corner with 1/4 " seam allowance on 3 sides and partially on the 4th side. The best way to do it is to start 1/4 off one of the corners and finish 1/4 off the other corner on the same side. 


Cut a 4" * 4" piece of fusible fleece as the batting in between.


 Put the batting the with the glue on one side of the sewn pieces. Iron on to fuse them together.


 Imp: Cut the corners of the piece now so that they are rounded.


Turn the right side of the fabric outside from the side that's partially sewn.


Iron on the open side to turn the ends of the fabric pieces inside the opening and prepare it for sewing.


Use any stitch to quilt the coaster.


I used iron-on-vinyl which I bought from walmart for laminating the coasters to make them waterproof. I found the stuff a lot cheaper at walmart than Joann. Iron-on-vinyl is easy to use. You just need to take out the lamination from the backing paper and put it on top of the fabric. Put the backing paper on top and iron on to fuse.


Here are how they look when complete.The last picture shows the complete set I made. It has 6 in it. 


Sunday, July 21, 2013

Thai curry

I have changed my routine where I only cook on weekends now. A weekend trip to the produce market is sometimes a feeling like it might be for a kid to go to a toy store. I decided that every weekend I will try to get some ingredient which I have never used before. This time I got habanero peppers. Along with that I picked up mushrooms, bell peppers and string beans. So I decide to make Thai curry with coconut milk. I head to the indian store and picked a can of coconut milk. Here is my recipe:

Thai curry

Ingredients:
  1. Coconut milk - 1 can
  2. Red and green bell pepper - 1 each
  3. String beans - 6-7 beans
  4. White mushrooms - 5-6
  5. Tomatoes
  6. Green onion - 1/2 bunch
  7. Firm tofu - 2 inch cube
  8. Spices - turmeric, coriander powder
  9. Green chillies - 1-2
  10. Mint leaves - 7-8
  11. Coriander leaves
  12. Lemon juice - 3 tsp. spoons
  13. Olive oil - 1 tbsp. spoons
  14. Cumin and mustard seeds
  15. Ginger and garlic
Preparation:
  1. Cut vegetables into pieces. Cut the bell peppers along their length.
  2. Make puree out of mint and coriander leaves
  3. Heat oil in a pan
  4. Put cumin and mustard seeds
  5. Now put long cut green chilli, small cut ginger and garlic. I also added few small cut pieces of habanero pepper. (Caution: use only small amount of habanero pepper. Its super hot)
  6. Let the ginger garlic be light brown
  7. Now add the small cut green onion and fry them for a minute
  8. Add cut tomatoes
  9. Add all the cut vegetables and mix well
  10. Add turmeric and coriander powder
  11. Add salt
  12. Now add the mint and coriander puree
  13. Add the lemon juice and mix everything well
  14. Add 1/4 to 1/2 can of coconut milk
  15. Add cubes of cut tofu and let it simmer for 5-10 minutes
Serve hot with rice. I got some rum cake as well and it went well as a desert after the thai lunch.


Sunday, March 31, 2013

Dahi-Vade


Dahi-Vade

Holi is over this year but it cannot be complete without having dahi-vade. Since childhood I am so used to having dahi-vade on holi.  This was my first time making them myself.


Ingredients:
1. Urad daal - 1 small bowl
2. Tamarind - 1/4 small bowl
3. Oil
4. Salt
5. Red chilli powder
6. Roasted cumin seeds powder

Preparation:
1. Soak urad daal overnight  (I added a small amount of moong daal as well)
2. Soak tamarind in water in a bowl for an hour
3. Mash tamarind, keep the pulp and discard the rest.
4. Boil the tamarind mix and then add sugar (or jaggery), some salt and a bit of red chilli powder to it.
5. Boil till it thickens. Keep the tamarind chutney aside.
6. Grind the urad daal into a fine paste beat it a little.
7. Make vade with hand (add a piece of green chilli or a raisin) in between and deep fry them till light golden brown.
8. Heat water in a pan and add 1 tsp salt to it.
9. Add the cooled down vade to the hot water and keep for 10 min.
10. Remove the vade from the water and squeeze out extra water by putting them in between palms.
11. Beat curd in a bowl and add some water to it to make it little thin.
12. Add curd to the vade and add tamarind chutney on top.
13. Sprinkle salt, cumin powder and red chilli powder on top and serve.

Sunday, January 13, 2013

Khajoor-Badam Laddoo (Dates-Almond balls)

Khajoor-badam laddoo

I tried Whole foods Dates-pecan rolls a while back at cousin's place. Wanted to make something sweet for Makar Sankranti so thought will try something healthy this time. Made a trip to whole foods specifically for the dates. Here is the simple recipe:

Ingredients:
1. Dates - 1 bowl
2. Almonds - 1/2 bowl
3. Dry grated coconut

Preparation:
1. Add dates and almonds in the grinder and fine grind it.
2. Make small balls out of this mixture.
3. Roll these bowls over the dry grated coconut to remove the stickiness.
4. You can also garnish with some dry fruits on top.
So far the easiest recipe in my list!


Featured Post

Kumaon Part 7 - Kausani - Baijnath - Apr 2023

April 30, 2023 See the other parts of this journey - part 1 , part 2 , part 3 , part 4 , part 5 ,  part 6 .  From our native village we went...